How to Turn Your 3D Printer into a CNC Machine
April 15, 2024
3D printers and CNC mills (also known as computer numerical control) machines both use the same basic concepts in the form of computer-generated patterns that are then cut or built into a material. While 3D printers use a virtual design, CNC mills actually build the design with materials such as metals and plastics. Thus making the process of creating a physical object from a virtual file is complete using both technologies.
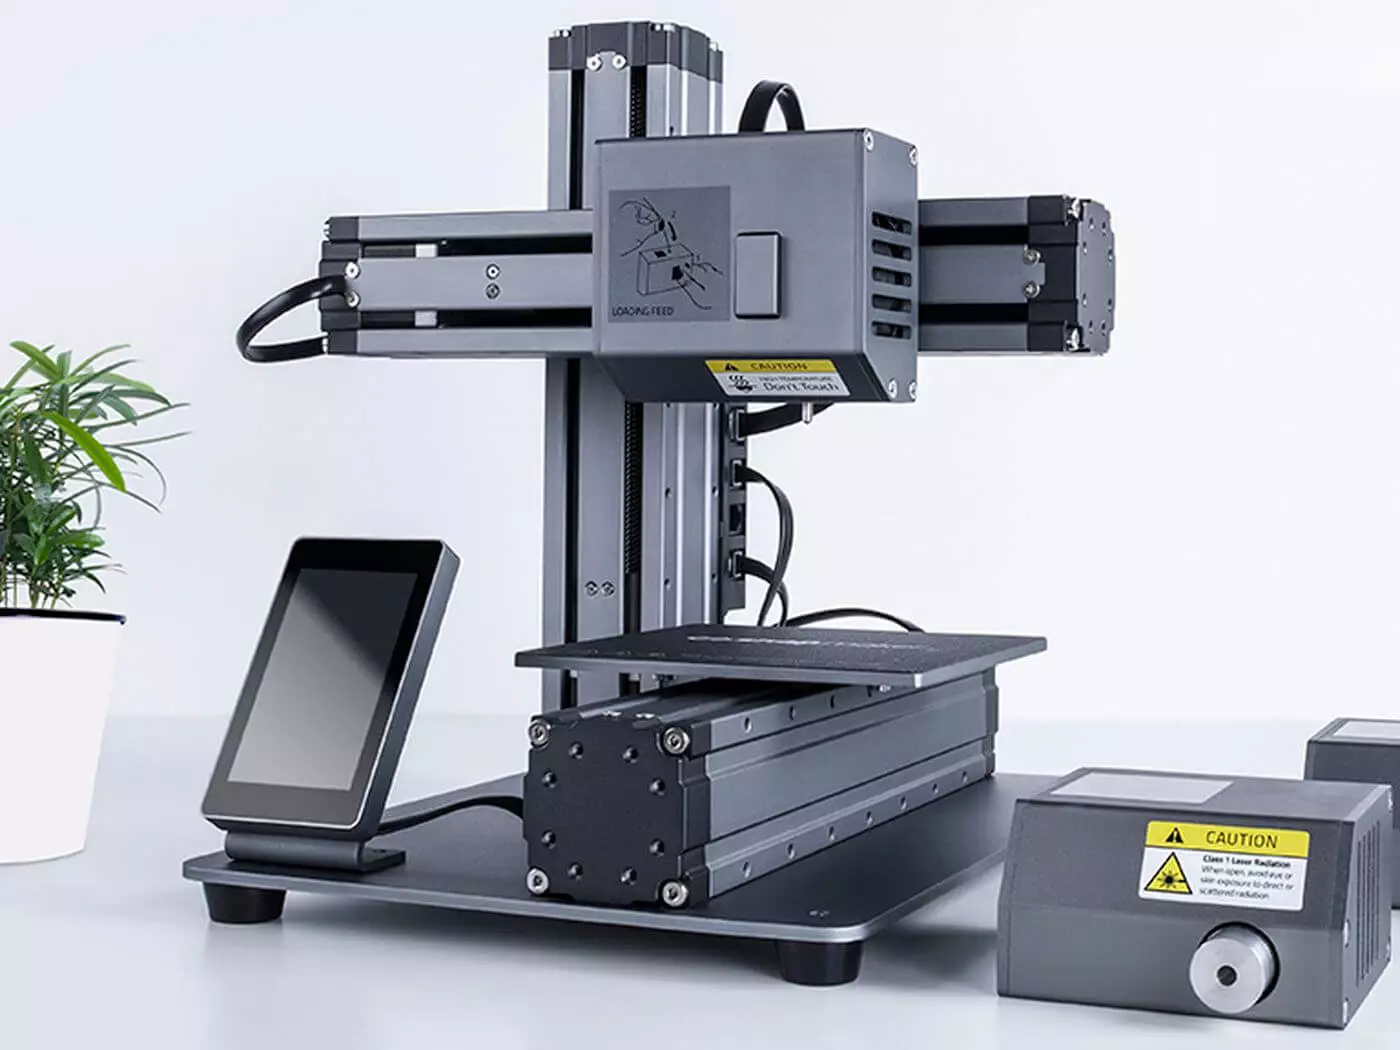
Source: Endurance Lasers
3D printers and CNC machines are great for prototyping. Though 3D printers are well known 3D printing, it’s of importance to also know that they can serve as a CNC machine. This is achieve by installing a diode laser on your 3D printer.
A good example of a laser module that you can install on your 3D printer and turn it into a CNC machine is the The Endurance Lasers Add-ons. Their laser attachment will turn your 3D printer into a powerful cutting/engraving machine capable of working on many materials. It’s an easy way to boost productivity and competitiveness in your business by adding laser cutting/engraving capabilities at a fraction of the cost of buying an entirely new machine.
It is not difficult at all to turn a 3D printer into a CNC machine. What you need are some basic tools and a couple of hours and you’ll be ready to cut your first piece of wood or other material.
Tools:
- Diode lasers
- Welder (you could use a soldering iron, but it will take much longer)
- Screwdrivers
- Glue like super glue or another strong adhesive (epoxy should also do)
- Drill (cordless drill preferable) You can start with a small electric one; if you want to make more complicated things you would need something stronger though. A manual hand drill should be enough for now. Eventually, you might want to get an angle grinder too (but this is not necessary).
- Sanding paper or something similar for smoothing the edges of your cuts after cutting plastic or wood
- A file (if you are cutting metal)
- Optional: a vice to hold the material while cutting (not very necessary for wood; if you cut thick metal pieces you want something like this, but this is rather expensive).
Process:
Step 1 – Disassemble your printer and make sure there is nothing left on it that could affect the final result. Take out all the bolts and screws, remove plastic parts, etc. You don’t need anything except for what you will actually use as part of the CNC machine itself. As always, take good care of your tools so they can serve you well in many future projects.
Step 2 – Measure the exact dimensions of your printer bed and make a list of all its dimensions (length, width, height). Now you need to find the center of the bed and mark it on the paper where the machine will be fixed.
Step 3 – From the center of the bed, measure and mark all four corners on your paper (the two front corners and the two back corners) and draw a line between them all creating an outline of your printer bed. The lines on the paper are guides for cutting the metal base later.
Step 4 – After you cut out this template, measure its dimensions (length, width, height) then cut four pieces of metal (two longer ones that will fit into the front corners and two shorter ones for the back corners) and drill holes in all four pieces of metal. You need to use bolts that are long enough to go through the base and the printer bed (a little bit longer than half of the length of your bolt). Use pre-drilled metal for this if you can; if not, make sure your drill bit is as large as your bolts, but not larger.
Bolts going through the metal base need to be long enough to go all the way through both the metal base and the printer bed
Step 5 – Cut a piece of plywood that fits into your printer bed then cut a smaller square on one end of it (the size should be half of the width and height of your plywood piece). Even though this piece is now smaller than the original one it will work as a spacer for your printer bed. This step is important because you want to make sure that even if there is some small difference in measurements between your printer and the metal base, your printer will still rest on the plywood in the end.
Step 6 – Drill holes into both ends of two of the long pieces of metal (holes should be larger than bolts) then screw them to the corners of your printer bed with bolts, nuts, and washers. This will secure your base to your printer bed.
Step 7 – Apply a generous amount of adhesive between the plywood spacer and the printer bed (in the area where they overlap) then put some heavy objects on top while your adhesive is drying.
Step 8 – After your adhesive has dried, drill holes into the corners of the spacer then screw it to your metal base with bolts, nuts, and washers. If you have a manual hand drill this would be a good time to use it.
Your base is ready! You can now attach a stepping motor to the bottom side where there are no bolts using zip ties. Place the base on top of your printer bed, center it properly and tighten bolts so that your printer doesn’t move around.
Now you are ready to attach the X-axis stepper motor to one side of your base! The exact way you do this depends on how many bolts/screw holes are available for attaching the stepping motor. If there is only one bolt in the center of your stepping motor, screw it in place with a nut then attach the whole thing to the side of your base using zip ties.
Step 9 – Attach the small gear wheel that came with your CNC machine kit to the end of your X-axis stepper motor shaft. This is what the Z-Axis will be connected to move your platform up and down.
Step 10 – Get your Y-axis stepper motor, place it on one side of your base and attach it with bolts, nuts, and washers. Attach your Z-axis bracket to this same side (or opposite side) using bolts, nuts, and washers.
Step 11 – Get your Z-axis stepper motor, place its shaft in the Z-axis bracket and attach it with bolts, nuts, and washers. Attach the small gear wheel that came with your CNC machine kit to this shaft to move your platform up and down. Your platform will be pushed UP when the motor turns in one direction and DOWN when it turns in the opposite direction.
Step 12 – Attach the X-axis stepper motor to the other side of your base then attach its small gear wheel to the small gear attached to your Y-axis stepper motor shaft.
If you face any issue and you are stack somewhere, you can watch this video on youtube to help you upgrade your 3D printer by adding an Endurance 10 Watt Laser.
Congratulations! Your CNC machine is ready for action! Now it’s time to make a simple drawing to test it out.

Darin is a wonderful person. He is very nice and always willing to help out! He loves his job because it lets him share interesting things with people who want to know about new developments in the world of technology.


